Hey everyone, let’s cut to the chase—if you’ve ever used vacuum bags for anything (food storage, moving clothes, storing seasonal gear, even industrial parts), you know the worst part is nailing the seal. I’m one of the guys who sells these bags, and I’ve gotten hundreds of DMs, emails, even random garage chats from people who say: “I followed the directions but it leaked!” or “My seal won’t close at all.” Spoiler: 9 times out of 10, it’s not the bag’s fault. It’s how you’re sealing it. I’ve seen folks rush through this step so many times, and they wonder why their vacuum bag is garbage. Today, I’m breaking down exactly how to seal a vacuum bag like a pro—no fancy tools, no overcomplicating it, just stuff I’ve learned from watching thousands of customers mess this up (and fix it) over the years. Vacuum Bag
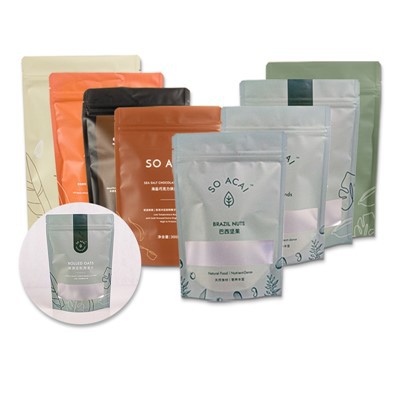
First, let’s get one thing straight: not all vacuum bags are made the same, and your sealing method depends a little on which kind you’re using. I sell a bunch of different types—some for food, some for moving, some for long-term storage—so I’ll cover the most common ones. But the core rules apply to almost every bag out there. Let’s start with the prep, because sealing starts way before you even touch that zip seal. I see people cram a bunch of stuff in the bag, then yank the zip shut, and wonder why the seal broke. Prep is key, I swear. Before you even put your items in, check the bag itself. Is there any tiny tear, scratch, or pinhole? Most people skip this, but that’s a rookie mistake. Even a pinhole you can barely see will let air in, no matter how good your seal is. I always run my fingers lightly over the entire outer surface and the edges before loading anything in—works way better than just looking. If I feel a weird bump or a snag, that bag’s out. No use wasting time on a damaged one.
Next, how you load the bag. This is another big one. If you cram 10 heavy sweaters in a small bag, and it bulges so much that half the zip area is covered in fabric, you’re gonna have a bad time. Leave at least 3-4 inches of empty space at the top, all the way across. That gives you room to seal without having fabric stuck in the zip. I see people try to pull the fabric out after the zip is started, and that just causes creases and gaps in the seal. Don’t do that. Also, smooth out the items before you seal—no big lumps sticking up near the zip, no loose threads. Threads are the worst, by the way. A single loose thread caught in the seal line will make it leak faster than anything. I always give the top of the bag a quick wipe down too, just to get rid of any crumbs, dust, or lotion (yeah, lotion from clothes is a thing that ruins seals).
Now, the actual sealing part. Let’s split this into two main types: zip-style vacuum bags (the kind you use with a handheld vacuum, a canister vacuum, or a manual pump) and heat-seal bags (the ones you use with a specialized heat sealer, common for food or industrial use). I get questions about both all the time, so let’s cover each.
First up, zip-style bags—these are the most popular for everyday use, and also the most commonly messed up. Let’s walk through it step by step. Once your items are loaded, and the top of the bag is clear of fabric, you start closing the zip. Don’t just squeeze it shut like a regular sandwich bag. Line up the two sides of the zip perfectly, then press down starting from one end, working your way to the other. For most zip bags, there’s a little track on each side—make sure the teeth are fully seated in the track, no gaps. I always run my finger along the entire zip line once I’m done closing it, pressing firmly to make sure every tooth is locked in. Then, here’s a step most people miss: after the zip is closed, there’s usually a little valve on the bag (or sometimes you use the edge of the zip itself) to attach your vacuum. Before you hook the vacuum up, press along the top edge of the zip one more time, just to squeeze out any extra air that snuck in while you were closing. I know it sounds small, but that extra squeeze removes the air that would otherwise make the seal weak.
Then, when you’re attaching your vacuum, don’t yank. Align the nozzle of your vacuum or pump perfectly with the valve (or the zip slot, for some bags). If it’s not on straight, you’ll get a bad seal there. Turn on the vacuum, and watch the bag deflate—stop before the bag gets too tight. Wait, another mistake people make: they suck all the air out until the bag is rock hard. Don’t do that. Especially for clothes or bedding, if you suck too much air out, the fabric creases so bad it’s almost impossible to smooth out later, and sometimes the seal can even break under all the tension. Stop when the bag is about 50-60% of its original size, that’s the sweet spot. Once you’re done vacuuming, quickly pull the nozzle out, and immediately close the valve (or seal the zip’s end cap) right away. Don’t wait around—if you take too long, air will start rushing back in through the gap.
Now, what if you’re using a manual pump instead of an electric vacuum? Same rules apply, but it’s a little more work, obviously. Line up the pump with the valve, pump until the bag is firm, don’t overdo it, then seal that valve right away. I’ve heard people say manual pumps don’t work, but it’s just that they’re not sealing the valve fast enough. If you seal it the second you’re done pumping, it works perfectly.
Okay, now the other big one: heat-seal bags. These are mostly for food, but some industrial vacuum bags use heat seals too. The trick here is not to overheat or underheat, and to make sure the bag is flat when you seal it. First, same prep: check for holes, leave space at the top, remove any crumbs or food bits. Food is a big one—if there’s a piece of bread crumb or grease on the seal line, the heat won’t melt the plastic properly, and it’ll leak. Once you’re ready, lay the bag flat on your work surface, make sure there are no wrinkles along the top edge that you’re gonna seal. Then, run the heat sealer along the edge, applying even pressure. Don’t hold it for 2 seconds and pull away—hold it for 3-5 seconds, depending on your sealer. Too short, and the plastic doesn’t melt enough; too long, and you’ll burn the bag, which ruins the seal. Some people try to seal two sides at once, but no—just one straight line, from end to end, no stops. Stops cause gaps. Once you seal it, let it cool for 10 seconds before you pick it up. Hot plastic seals can break if you move them right away.
Wait, I should also talk about common mistakes that I see over and over, because even if you follow all the steps, one tiny thing can mess it up. First, storing vacuum bags in extreme heat or cold. If you leave a bag in a hot attic for a few months, the plastic will break down, and the seal will fail. Same with freezing for long periods—some vacuum bags aren’t rated for extreme cold, so the seal can become brittle and crack. If you’re using bags for long-term storage, make sure to get ones labeled for that use (hint: I sell a line specifically for long-term food and gear storage, they hold up way better than the cheap ones from the dollar store). Another mistake: reusing vacuum bags too many times. I know, it’s tempting, but after 2-3 uses, the plastic starts to stretch, and the zip or heat seal won’t lock properly. Don’t try to squeeze a 5th use out of a $0.50 bag—just get a new one, it’s not worth ruining whatever you’re storing.
Also, what about leaks? How do you check if your seal is good, after you do all this? I always do a quick squeeze test after sealing. Give the bag a firm squeeze all over—if air comes out through the seal, you missed a spot. Run your finger along the seal line again, press firmly, and make sure every part is closed. If it’s a zip bag, sometimes the end of the zip (the part where you open and close it) is loose—make sure that little end cap is snapped all the way in. I’ve fixed so many leaks just by pushing that end cap back on. For heat-seal bags, if you see a little gap along the seal, you can sometimes re-seal it with a hair dryer (on low heat, don’t burn it!) or a mini heat sealer, but only if you catch it right away—if air has gotten in and the bag’s been sitting for a while, it’s probably too far gone.
Let me throw in a little real example here, because I love hearing from customers. Last month, a lady emailed me saying her vacuum bags for winter coats leaked every time she put them in storage. She said she followed the directions exactly, but they were all full of air by spring. I asked her to send a pic, and when she did, I saw her mistake: she crammed three coats into a small bag, so half the zip was covered in coat fabric, and she tried to pull the fabric out after closing the zip. No wonder it leaked! I told her to split the coats into two smaller bags, leave 3 inches of space at the top, and make sure the zip was fully clear before closing. She did it, and emailed me a week later saying all her coats were perfectly sealed. That’s the kind of win I live for—fixing people’s frustration with something that should be so easy.
Another common question: can I seal a vacuum bag without a vacuum or heat sealer? For zip-style bags, sort of—you can use a straw to suck out the air, but it’s way harder to get all the air out, and you have to seal the valve super fast. It works in a pinch, but I always recommend using a proper vacuum or pump if you’re gonna use the bag for anything important. For heat-seal bags, you can’t really do it without a heat sealer, so that’s why they’re designed for use with that tool.
Wait, also, what about vacuum bags for food vs. non-food? Don’t mix them up. Food-grade vacuum bags are made to not leach chemicals into your food, and they’re thicker so they handle moisture better. Non-food bags are cheaper, thinner, and not safe for food. I see people grab a moving vacuum bag to store meat or veggies, and that’s a huge no—those chemicals can transfer into your food, and they won’t seal as well because they’re not rated for moisture. So always check the label, that’s a quick fix.
Let’s wrap this up with a quick recap, so you don’t have to scroll back and forth. 1. Prep: check the bag for holes, wipe it clean, leave 3 inches of space at the top, remove loose threads. 2. For zip-style bags: close the zip fully, squeeze out extra air, attach your vacuum/pump, stop before it’s rock hard, seal the valve immediately. 3. For heat-seal bags: lay flat, seal in one straight line, apply even pressure, let cool before moving. 4. Test the seal with a squeeze, fix any gaps right away. 5. Don’t over-reuse bags, don’t store them in extreme temps, match the bag to what you’re storing.
At the end of the day, sealing a vacuum bag isn’t rocket science—it’s just paying attention to the little steps that everyone skips. I’ve sold vacuum bags for years, and the number one complaint I get isn’t that the bags are bad—it’s that people aren’t sealing them right. If you follow these steps, I promise you’ll have zero leaks, and your stored stuff will stay fresh, compact, and safe.
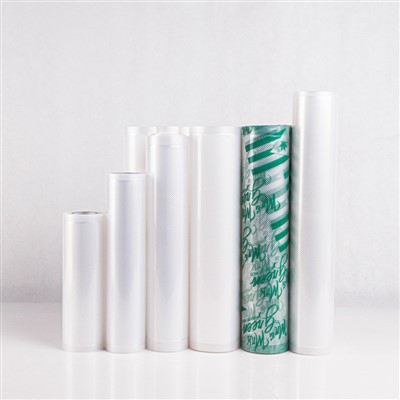
If you’re looking for the right vacuum bags to make this even easier, I’ve got options for every use case—food-grade zip bags, heavy-duty moving bags, long-term storage bags, even industrial ones. Whether you’re packing for a move, storing holiday decorations, meal prepping for the month, or keeping spare parts safe, I’ve got you covered. If you have questions about which bag works best for your project, or you want to order bulk, hit me up to chat through what you need. No awkward sales pitches, just honest answers from someone who’s been in this game for a long time.
Liquid Bag References:
- “Vacuum Bag Sealing Best Practices,” Packaging Association, 2023
- U.S. Department of Agriculture, “Food Storage Using Vacuum Sealing,” 2022
- “Common Failures in Vacuum Packaging,” Journal of Packaging Technology and Science, 2021
- Home Storage and Organization Association, “Tips for Vacuum Bag Use,” 2024
Shenzhen Hongbang Packaging Production Co., Ltd.
We are one of the most experienced vacuum bag manufacturers and suppliers in China, specialized in providing high quality custom service. Please feel free to buy bulk vacuum bag made in China here from our factory. For quotation and free sample, contact us now.
Address: Room 601, BLDG D, Wisdom Centre, No. 58 Nanlian Road, Longgang, Shenzhen China 518116
E-mail: pm@hongbangpack.com
WebSite: https://www.hongbangpack.com/
