If you’ve ever stood on a construction site watching a crawler excavator move dirt, dig foundations, or load materials, you know it’s not just the machine that gets the job done well—it’s the bucket paired with it. As someone who’s spent the last decade supplying crawler excavators and their attachments to construction teams, landscaping companies, and mining operations across North America, I can’t tell you how many times I’ve seen a great excavator bring work to a halt because someone grabbed the wrong bucket. A too-narrow bucket slows down digging and forces operators to make twice as many passes. A too-deep bucket gets stuck in soft dirt and spills material all over the site. A bucket made for light digging crumples the first time it hits a rock wall. Choosing the right bucket isn’t just a small, afterthought decision—it’s the difference between finishing a project on time, going over budget, or even damaging your expensive equipment. Let’s break down exactly how to pick the right bucket for your crawler excavator, with real, on-site lessons I’ve learned working side-by-side with operators, not just textbook specs. Crawler Excavator
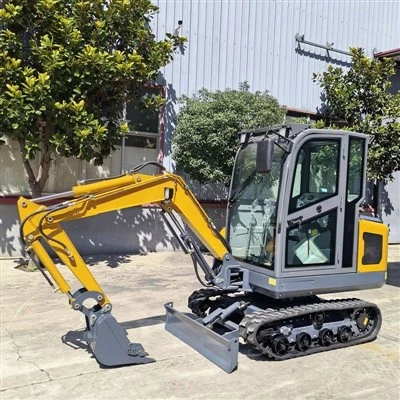
First, you have to start with what you’re actually going to use the excavator for. This might sound obvious, but you’d be shocked how many new customers come to me and say, “I need a 20-ton excavator, get me a bucket,” without telling me if they’re digging a residential foundation, moving gravel for a road, or ripping up old concrete for a demolition project. Every bucket is engineered for a specific primary task, and mixing those up leads to wasted time and money. Let’s go through the most common job types I see and the buckets that fit them best. If your work is mostly general excavation—like digging small building foundations, trenching for utility lines, or moving topsoil—a general-purpose (GP) bucket is almost always your best bet. These buckets have a moderate depth, a wide set of teeth, and a sturdy, curved shape that balances digging power with material holding capacity. I watched a landscaping crew in Ohio use a GP bucket last spring to dig six 50-foot-long trenches for a new sewer line; they finished a day ahead of schedule because the bucket could scoop loose topsoil and compacted clay without spilling, and the teeth held up against small rocks in the soil. The key here is moderation: GP buckets aren’t the fastest for moving large volumes of loose material, and they’re not tough enough for hard rock, but they work for 70% of the small-to-medium jobs our customers do.
If you’re working with loose, bulk material—like loading gravel into dump trucks, moving sand for concrete, or stockpiling mulch—you need a material handling bucket (sometimes called a ditching bucket, though that term is a bit misleading). These buckets are shallower than GP buckets, with a flatter bottom and wider opening, so they can scoop more material per pass without getting too heavy. Last summer, a road construction company came to me after buying a GP bucket for loading crushed stone; they were taking three times longer than their competitor because the GP bucket would only hold half the amount of a material bucket, and the deep sides would spill small gravel as they swung it. Swapping to a material bucket cut their loading time per truck in half, and the flatter edge meant they could clean up stockpile edges much faster too. The downside? Material buckets aren’t designed for digging into compacted dirt or hard ground—they’ll slide over it instead of biting in, so you’ll need to use a GP bucket or a trenching bucket for that work first if your site has hard soil.
For jobs that involve tough, abrasive material—like digging in hard clay, breaking up compacted gravel, or ripping up asphalt—you need a heavy-duty (HD) digging bucket. These are built with thicker steel, reinforced edges, and heavier teeth that are designed to withstand impact. Last winter, a utility company working in northern Minnesota called me in a panic; their 30-ton excavator’s GP bucket had bent after hitting a frozen patch of ground they didn’t see, and they had to wait three days for a replacement bucket to come in, delaying their project by a week. A HD bucket would have handled that frozen ground without bending, because the steel is 20-30% thicker than a GP bucket’s. The tradeoff here is weight: HD buckets are heavier, so if you’re using a smaller excavator, adding a heavy bucket can reduce your lifting capacity and put more strain on the machine’s hydraulic system over time. It’s a balance between durability and machine load.
Then there’s trenching, one of the most common jobs for crawler excavators that needs a very specific bucket. A trenching bucket is narrow—usually 6 to 24 inches wide, depending on the job—with straight sides and no curved sides, so it digs a trench that’s exactly the width you need, no extra dirt to clean up. A lot of new operators try to use a GP bucket for trenching, but that leaves extra space on the sides of the trench, forcing someone to go back with a shovel to smooth it out or remove excess dirt. I had a customer last summer who was installing fiber optic lines; he used a 12-inch trenching bucket instead of his GP bucket, and cut his trenching time by 40% because he didn’t have to do extra finishing work. Trenching buckets also have shallow depths compared to GP buckets, which keeps the center of gravity lower when digging deep trenches, making the excavator more stable.
Now that you’ve got the basic job type, you need to match the bucket to your excavator’s specs. This is where a lot of customers make mistakes, either by buying a bucket that’s too small or too big for their machine, and it’s one of the first things I check when a customer comes to me with a question. The most important spec here is the bucket’s capacity, measured in cubic yards. The rule of thumb is that the bucket’s capacity should match the excavator’s lifting and digging capacity; if your excavator is rated for a 1 cubic yard bucket, don’t buy a 1.5 cubic yard bucket just to move more material—you’ll strain the hydraulic system, wear out the track motors faster, and even risk tipping the machine if you’re digging on uneven ground. I worked with a small construction company in Texas two years ago that bought a 20-ton excavator and a 1.2 cubic yard bucket, even though the machine’s spec sheet said it was rated for 0.9 cubic yards. After three months, their track system started leaking, and the service technician said the over-sized bucket was putting 25% more stress on the tracks than they were designed for. They had to replace the tracks early, costing them $8,000, just to save a few minutes per job. Always check your excavator’s manufacturer specs, and if you’re not sure, ask a supplier with experience—don’t guess based on the size of the bucket alone.
Another key spec is the pin size and spacing on the bucket. This is the connection point that attaches the bucket to the excavator’s arm, and if it doesn’t fit exactly, you can’t use the bucket at all. A lot of customers bring in an old bucket they have on hand and try to match the pins to a new excavator, but even a ¼-inch difference in pin diameter or spacing will keep it from fitting. The easiest way to avoid this is to have your excavator’s model number ready when you’re talking to a supplier—we keep a database of pin sizes and spacing for every major excavator brand, from Caterpillar to Kubota, so we can pull the right info in 30 seconds, no measuring needed. I once had a customer bring in a measuring tape and try to tell me the pin size of his 10-year-old excavator, but he measured from the wrong points on the arm and ordered a bucket that didn’t fit. Sending him back to get his model number saved both of us a lot of hassle.
Next, think about the features that will make your life easier on the job site, beyond just the bucket’s shape and size. Teeth are a big one—most buckets come standard with bolt-on teeth, which are easy to replace when they wear down, versus welded teeth, which are more difficult to swap out. Bolt-on teeth also let you switch to different types of teeth for different jobs: pointed teeth for digging in hard rock, blunt teeth for moving loose material, and digging bars for breaking up asphalt. We always recommend bolt-on teeth for most customers, because replacing a single tooth is $20-$30, compared to $150-$200 to weld on a new set, and you can do it in 10 minutes instead of waiting for a welder to come to the site.
Edge protectors are another feature worth considering, especially if you’re working on abrasive material like concrete or gravel. These are steel plates along the bottom edge of the bucket that prevent the main bucket body from wearing down. I’ve seen buckets get so worn down along the edge that the steel is thin enough to bend, which means you have to replace the whole bucket instead of just the edge. Edge protectors add a little extra cost upfront, but they extend the life of your bucket by 2-3 times, which saves you a lot of money in the long run.
One thing I always tell customers is to think about the jobs you might take on in the future, not just what you’re doing right now. If you’re a small landscaping company that mostly does residential work now, but you’re planning to take on a commercial foundation project next year, you might want to buy a GP bucket that can handle both small trenching and foundation digging, instead of buying a separate bucket for each job. Alternatively, if you’re a contractor that does a lot of trenching for utilities, a dedicated trenching bucket is worth the extra cost if you know that’s going to be 80% of your work for the next few years. It’s better to pay a little more upfront for a bucket that works for multiple uses than to have to buy another one in six months.
I also can’t stress enough the difference between cheap, generic buckets from no-name brands and quality buckets from reputable suppliers. I’ve had customers come to me with buckets they bought online for half the price of a good bucket, and within three months, the edge had cracked or the teeth had fallen off. Those cheap buckets are made with thin, low-quality steel that can’t handle the stress of excavation, and they don’t go through any quality control checks. We only sell buckets made from high-grade abrasion-resistant steel, and we inspect every single one before it leaves our warehouse. Last year, a customer who bought a cheap bucket online tried to return it to us because it was defective, but we don’t sell those; we stand behind every bucket we supply, and we offer a warranty on material and workmanship that generic brands can’t match. At the end of the day, a good bucket is an investment that will last 5-10 years, while a cheap bucket might only last one or two jobs.
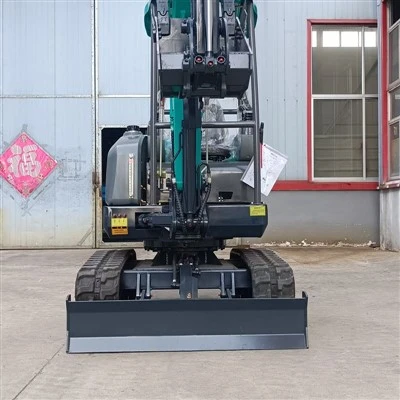
Let’s wrap this up with a quick checklist you can use next time you need to buy a bucket for your crawler excavator. First, define your primary job: is it general excavation, material handling, heavy-duty digging, or trenching? Second, check your excavator’s specs to confirm the correct bucket capacity, pin size, and arm spacing. Third, consider add-on features like bolt-on teeth and edge protectors that will extend the life of your bucket. Fourth, think about future jobs you might take on to avoid buying multiple buckets when you don’t need to. Finally, choose a reputable supplier that can help you if you’re not sure, instead of guessing or buying a cheap generic bucket online.
Loader Choosing the right bucket doesn’t have to be complicated, even if it seems like a small part of your crawler excavator. I’ve seen too many projects delayed, budgets blown, and equipment damaged because someone picked the wrong bucket, and it’s completely avoidable. If you’re not sure which bucket is right for your job, or you need to replace a worn bucket, don’t guess—reach out to our team. We’ve worked with hundreds of construction crews, landscaping companies, and mining operations to match them with the right buckets for their excavators, and we can help you too. Whether you need a GP bucket for residential foundations, a trenching bucket for utility lines, or a heavy-duty bucket for hard rock, we have the experience and products to get the job done right.
References
- Caterpillar Inc. (2022). Crawler Excavator Attachment Selection Guide. Peoria, IL: Caterpillar Inc.
- Kobelco Construction Machinery America. (2021). Matching Excavator Buckets to Application Requirements. Houston, TX: Kobelco Construction Machinery America.
- International Union of Operating Engineers (IUOE). (2020). Best Practices for Excavator Attachment Use and Maintenance. Washington, D.C.: IUOE.
- Association of Equipment Manufacturers (AEM). (2019). Construction Attachment Safety and Performance Standards. Milwaukee, WI: AEM.
Shandong Feisite Machinery Co., Ltd.
As one of the most professional crawler excavator manufacturers and suppliers in China, we’re featured by quality products and good service. Please rest assured to buy cheap crawler excavator made in China here and get quotation from our factory. Customized orders are welcome.
Address: 100 meters south of Zengfusi Village, Mihe Town, Qingzhou City, Shandong Province
E-mail: Wpeng19911103@qq.com
WebSite: https://www.shandongfeisite.com/
